
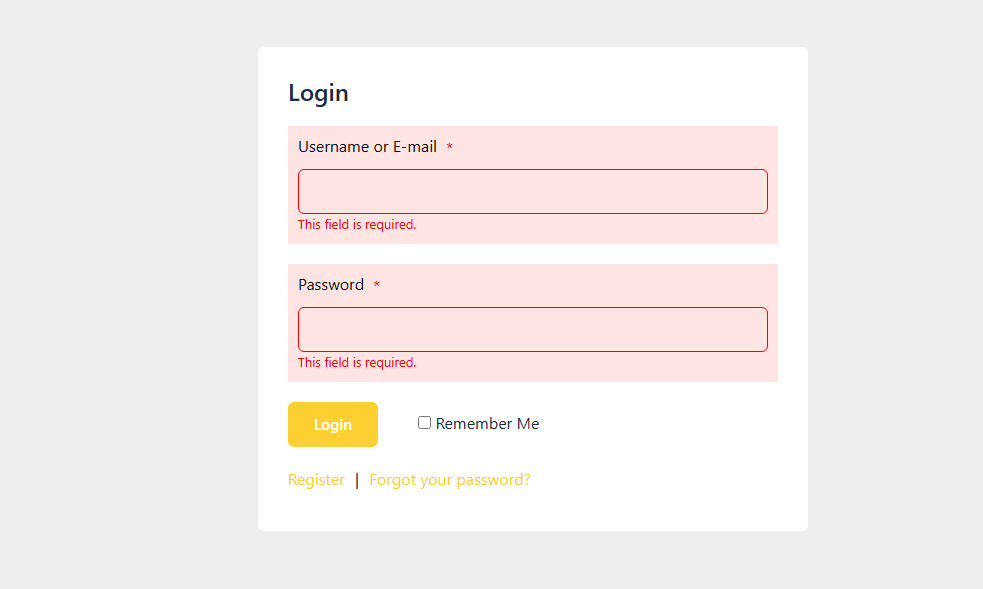
Login / Register Page
The login/Register page is mandatory before you can create web pages.
It will look like this:
Dashboard page
After you Login you will see your DASHBOARD screen. This screen holds all the relevant information regarding your websites.
The dashboard screen will look like this:

The Listing Page
In the Listings page you can ADD new Listing (AKA Website) and Edit all your existing Websites.
The Account Details Page
In this page, you can see and Edit your profile and contact details
This page looks like this: 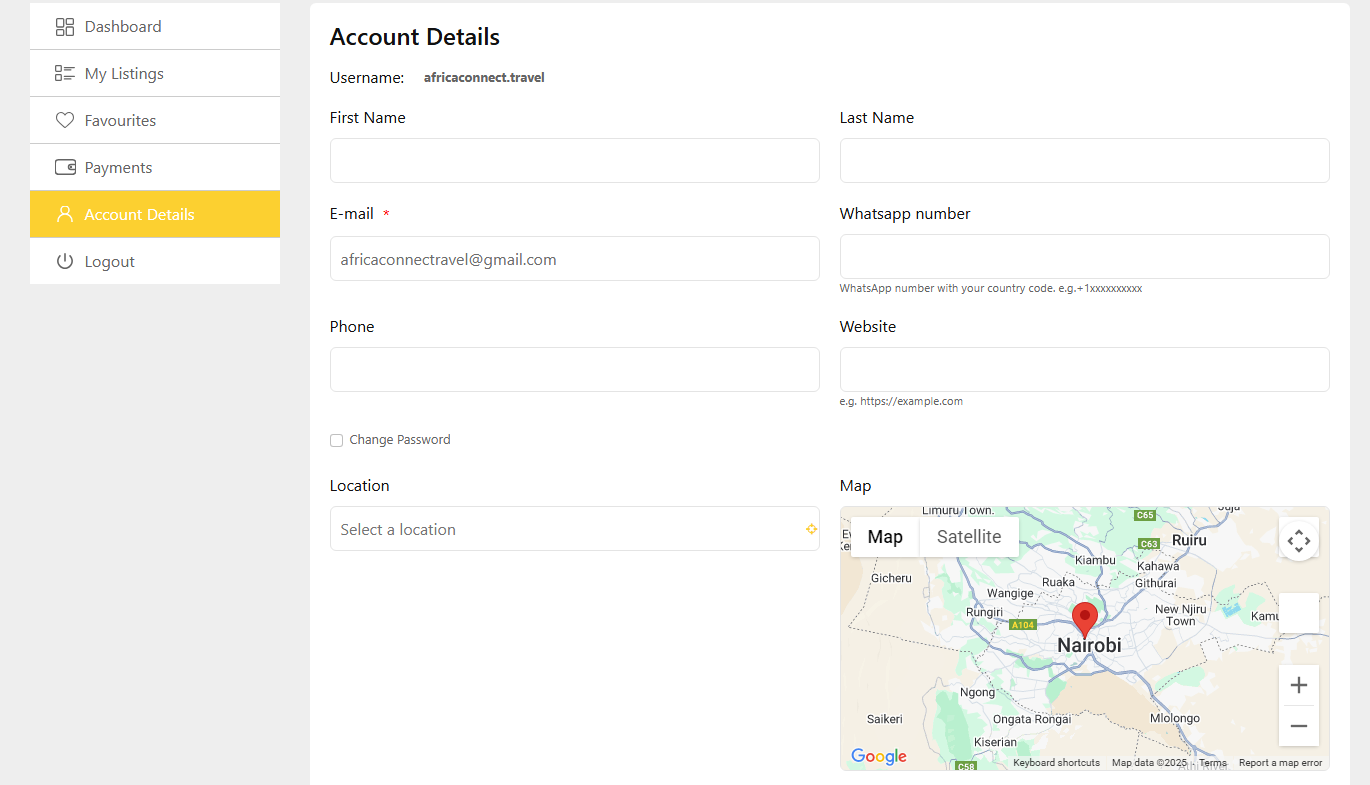
In these tutorials we cover:
- Webzzy Webpage Builders
- Webzzy Webpage Editors
Editors
When you are creating a new LISTING (aka user website) there are data input elements, a pictures gallery, document upload area and 2 WEBPAGES – called Profile and Services.
These two areas are HTML based and will render as the user website pages.
Eash should be designed as a single page/landing page.
The PROFILE page should contain all the general information about the user or business.
The SERVICES page should provide additional information – e.g. the services the site offers, Catalogs, Menus, Products or even a linked page from another web site.
To edit the PROFILE and SERVICES elements you will be using ONE of our Editors.
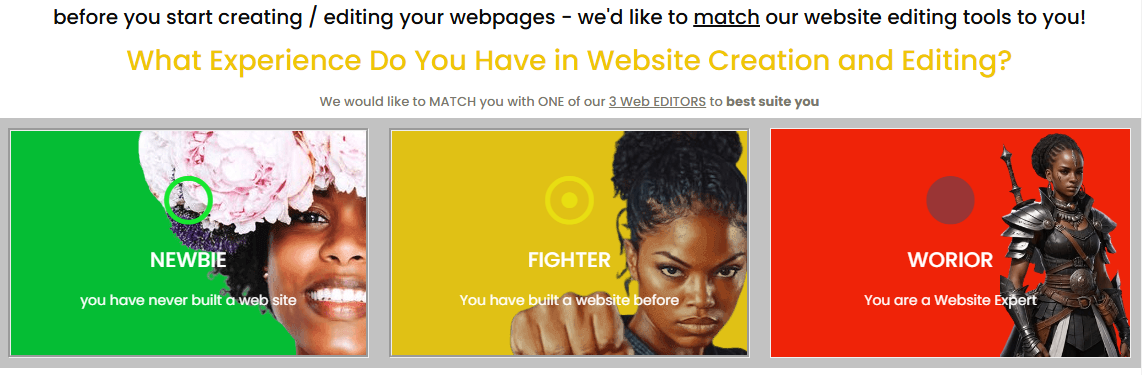
They are designed for different level and skills of the user.
BLOCKS Editor – for Newbies
WYSIWYG Editor – for Advanced users
VISUAL Editor – for Experts
This is how the three Editors show up in WEBZZY
However, it is up to YOU to decide which one of them is more convenient for you to use.
We HIGHLY recommend using the SAME Editor for a given site.
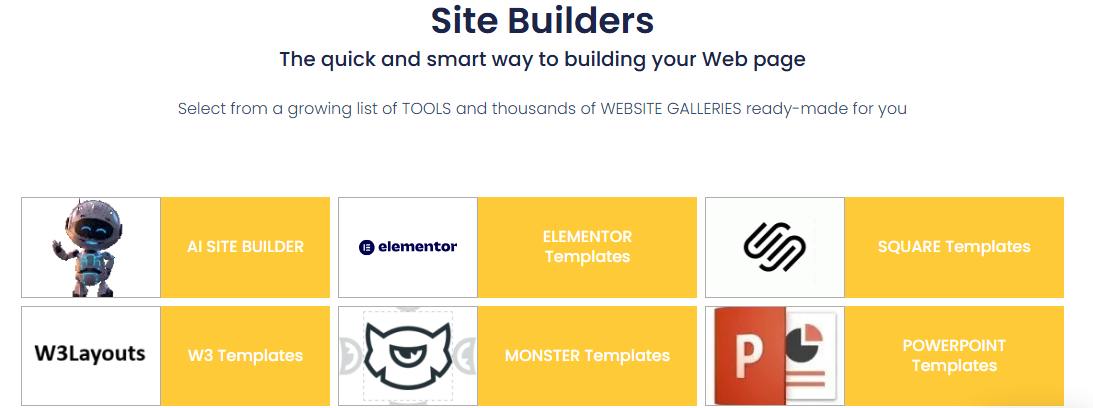
Site Builders
The other part of the Tutorials referes to the Site Builders.
These include:
- HTML Templates
- AI Site Builder
- Powerpoint Builder
This is how the three Editors show up in WEBZZY
You will be offered to use the site builders as a rapid and elegant way to design the PROFILE and SERVICES webpages.
Once you used any builder you can continue to edit its design output with the your chosen editor you previously selected.
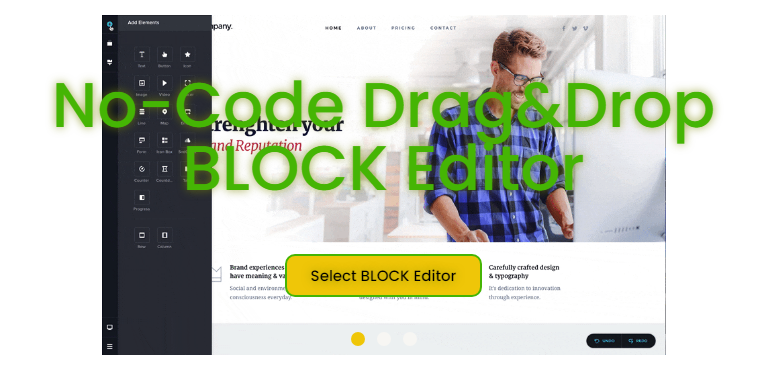
The BLOCKS Editor (Brizy)
This is how you choose the BLOCKS Editor in WEBZZY
Complete playlist click here
Get an Interface Tour
Editor Blocks
Editor Templates / Layouts
Sliders
Parallax Effects
Shortcuts
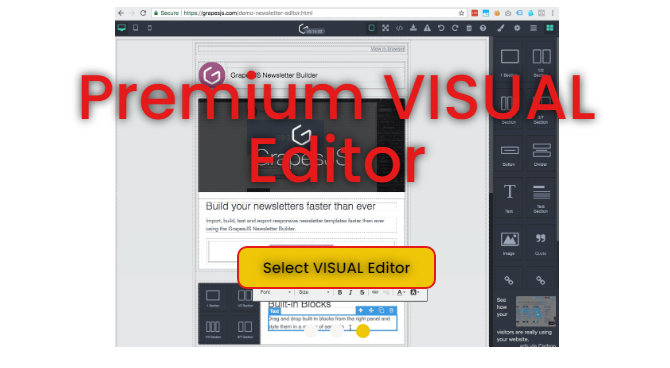
The VISUAL Editor (GrapesJS)
This is how you choose the VISUAL Editor in WEBZZY
Basic Demo of the Editor
Advnce Demo of the Editor
Tutorial how to build a page
Quick overview
Complete Introduction
Website Builders
The Site Builders are a collection of libraries and tools offered to you to speed up your site builing process.
These include:
- HTML Templates
- AI Site Builder
- Powerpoint Builder
This is how the Site Builders show up in WEBZZY
Powerpoint builder
The Powerpoint UPLOAD screen looks like this: 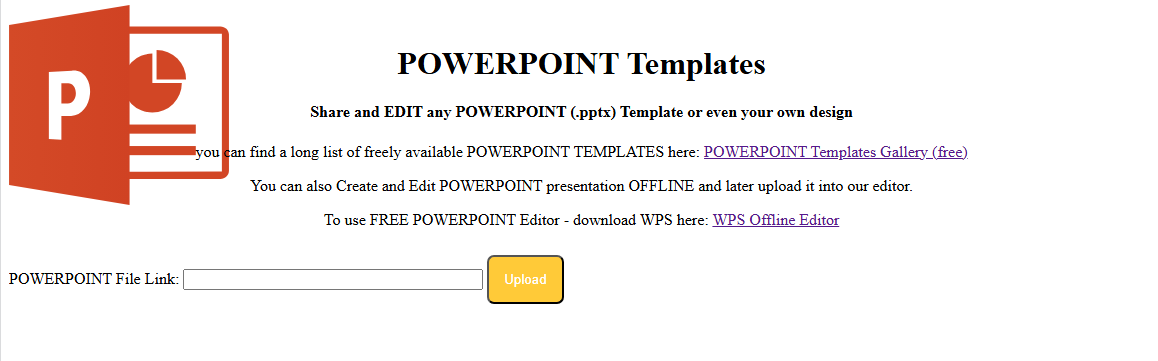
You can either upload a PowerPoint presentation you already have OR choose any PowerPoint template you like from the GALLERY we provide the link for, to serve as the basis for your webpage.
It’s free!
If you do not have the Microsoft Powerpoint Editor, You can download the free WPS offline editor to create or make changes to any Powerpoint presentation before you upload it to WEBZZY.
the Powerpoint builder is designed to import any Powerpoint (.PPTX) presentation and turn it into a webpage. You can then edit it using one of the two editors of your choice – WYSIWYG or the VISUAL Editor.
Templates
Selecting a Template
Once you select one of the templates libraries, you will be presented with a selection of templates to choose from. most libraries include thousands of templates in different categories. You can browse and select the one you like the most. If you select the wrong one. no worry. You can always choose another one by calling the Website builder list again. Selecting another template – will OVERRIDE the current page design. so please pay attention to this.
Here is how a typical list of templates is displayed in WEBZZY
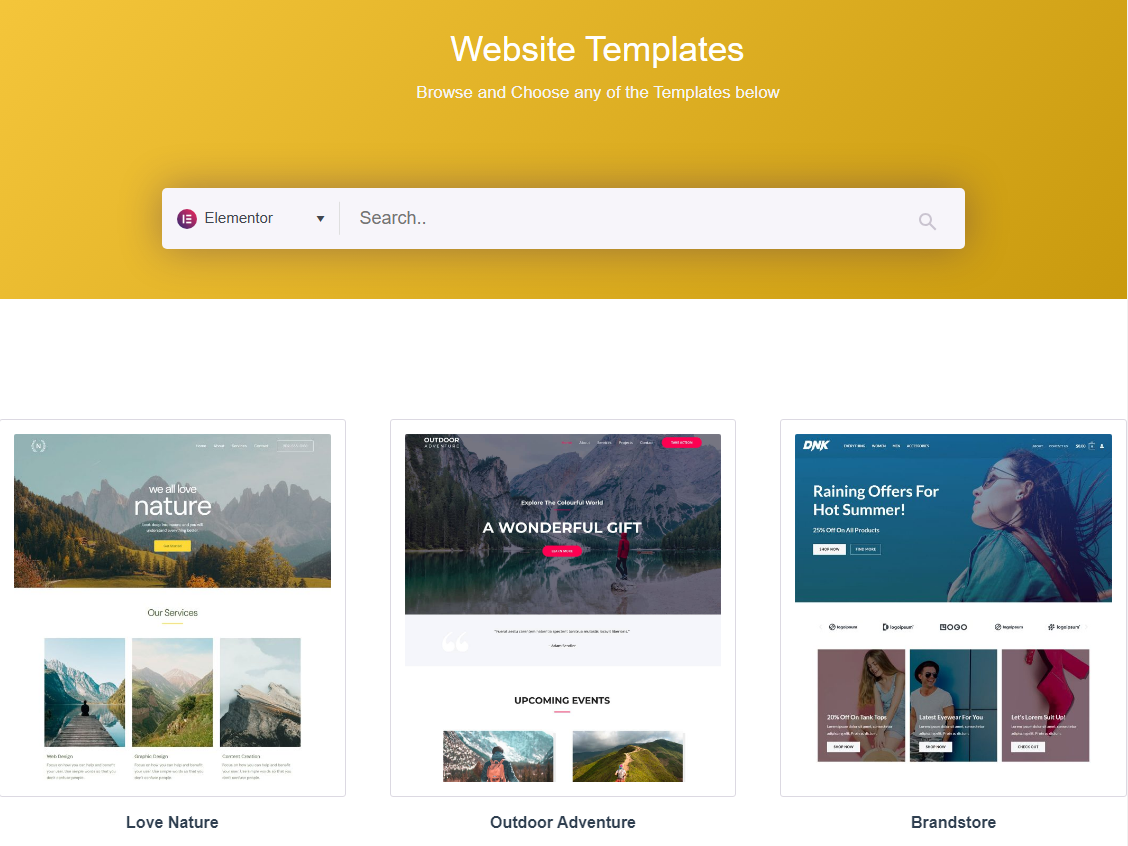
in this example – we display the Elementor Templates builder
Selecting a Template
once you select to view the template it will present with a red [GET THIS] button on the top right. like in this example: 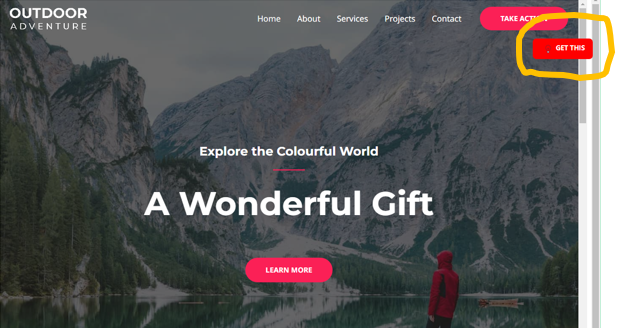
Clicking on this [GET THIS] button will load the template into your chosen editor – where you can edit its contents and design further.
W3Layouts Templates
The selection of a W3Layout template is a bit different from the rest. You will have this top RIBBON above the templates selection screen. 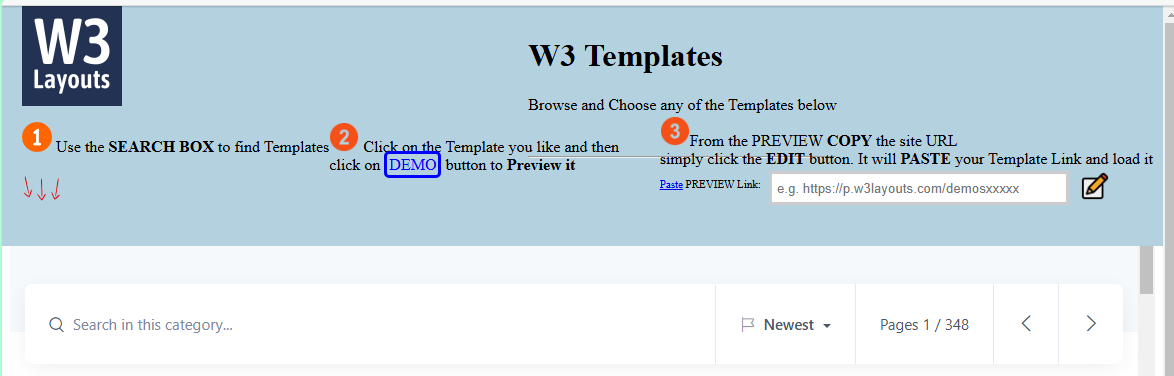
in this case you need to follow the 3 steps process in order to select a template.
- Browse or use the search box below to find a template
- When you find a template click on it and then click on DEMO this template to open it
- Finally – copy the URL of the template demo tab back into the ribbon – in the PREVIEW LINK box and click the EDIT button
This process will take a few seconds and then will load that template into your editor area, where you can continue to edit the content and design of that template
AI Builder
AI Builder Intro Screen
When you select the AI webpage Builder you will see this intro screen – 
This intro is the top part of a page that includes all you need to know about the AI Builder.
When you scroll down a bit – you will see the next part – the AI Prompt Screen.
The AI prompt Screen looks like this: 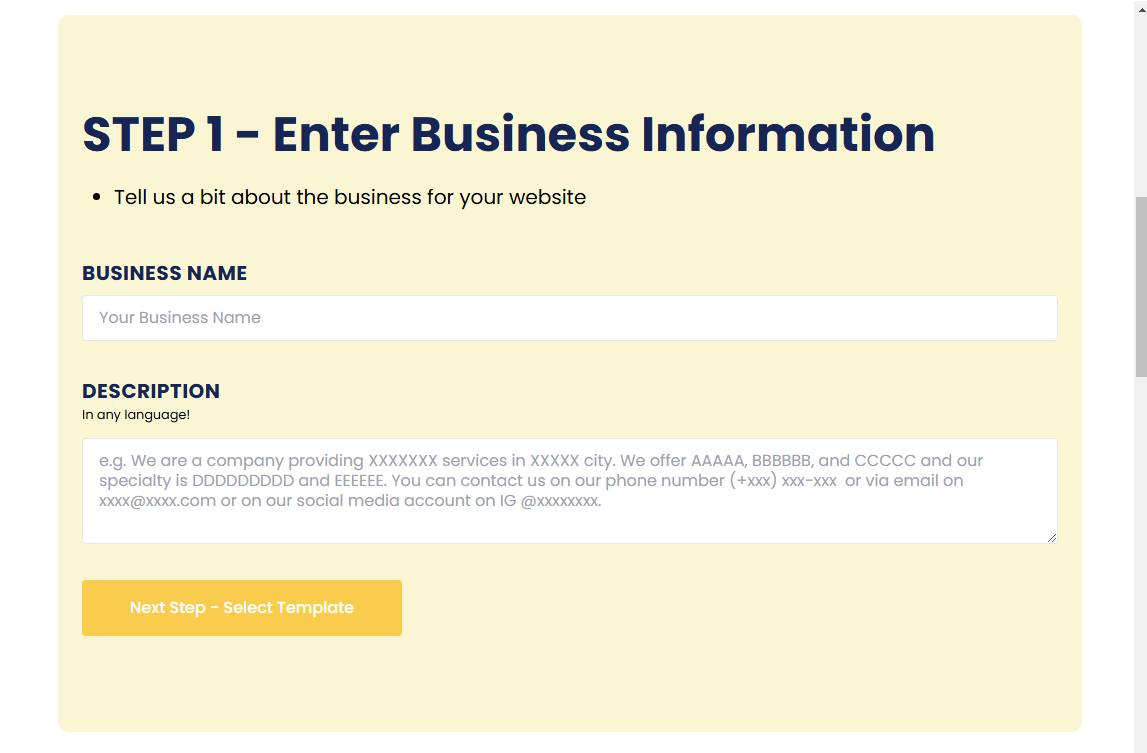
and it is followed by a helpful 3 step help below it. that looks like this: 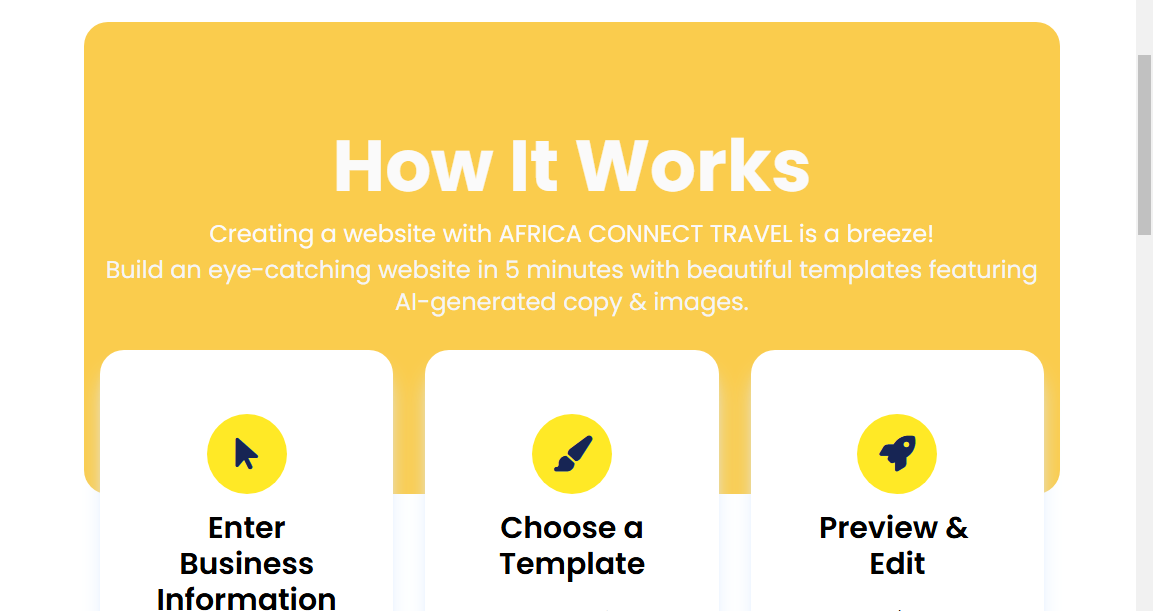
the AI Prompt
The AI PROMPT is what controls the AI Engine and where you should instruct it about what exactly you would like to see on your web page.
You can keep it high-level or as detailed as you wish. There is no need to use technical terms at all.
If you already filled the Profile Form above with your business title and description – these will already show up in the prompt.
We highly recommend that you describe your page in as much detail as possible. You can include information like:
- You page main purpose
- Your Slogan
- Who is the page for
- About You
- Contact Details
- Contact Details
- Products and Services
- Anything else that you want to see in he page
The prompt should as detailed as you can and as long as you wish.but not TOO long.
You prompt should look something like this: 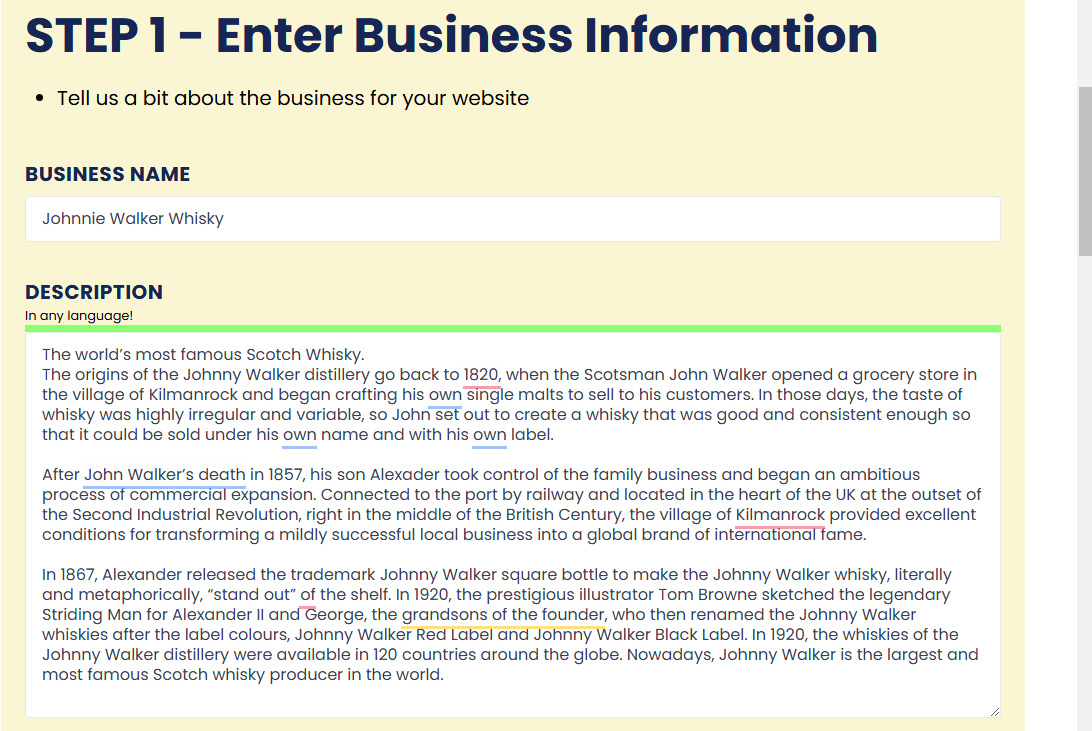
Display AI design Templates
So the AI builder has two parts. The AI engine that will generate your text images and video content AND the second part that is a template – of how this content will be arranged on a webpage.
On the AI Prompt Screen Click on “Choose Template” to get to this second step.
Select AI Template
You will be presented with a screen like this one: 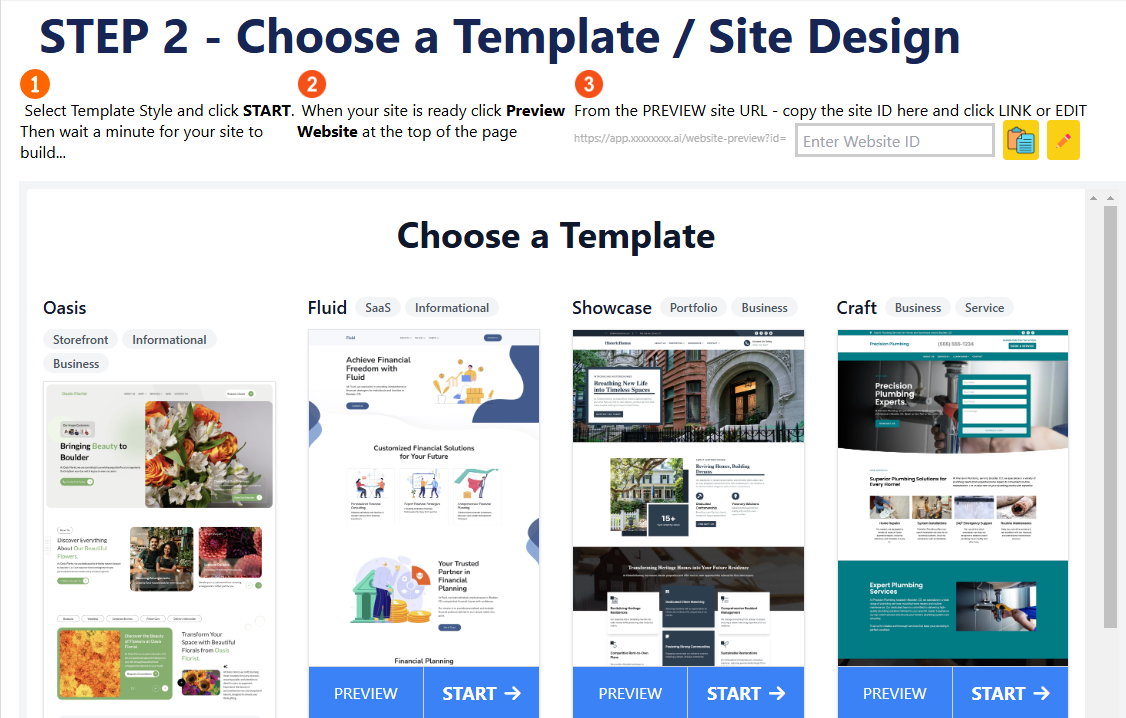
You can view any of the templates by clicking PREVIEW. to Start the the process of BUILDING YOUR PAGE click on START under your prefered template.
this will tell the AI engine to create your contents and present it using the template you chose.
The process of creating the final webpage can take up to 60 seconds during which you will see a progress screen which looks like this: 
Loading the AI Webpage into the Editor
Once the AI build has completed its work you will see the resulting page shown on the left part of the screen.
It will look like this: 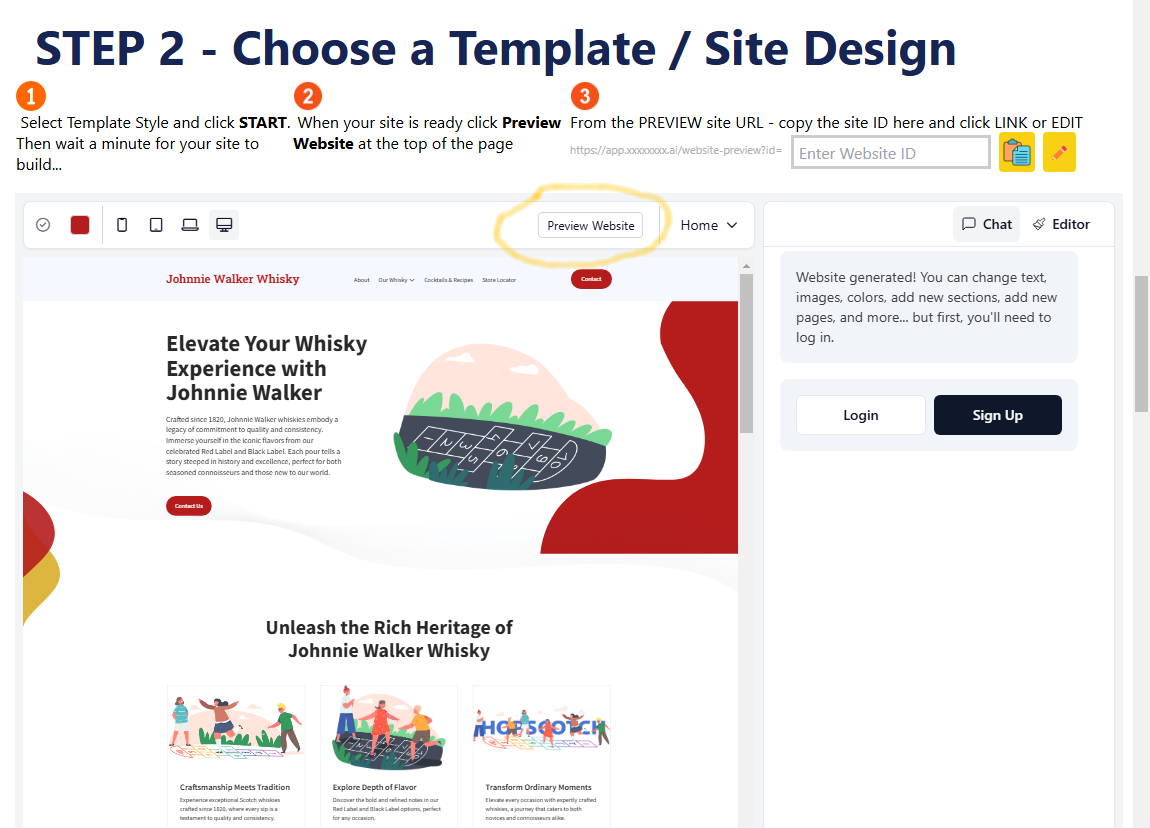
In this example – the Johnnie Walter AI generated page is ready. Now click on the [PREVIEW WEBSITE]
This will show the AI generate page in a new browser TAB.
It will look like this: 
Now, please COPY the URL of this tab back into the step 3 of the “STEP 2 – Choose a Template / Site Design” page – into the Step 3 – [Enter Website ID] box
Now you can choose either:
- Load the page to the Editor for EDITING (recomended)
for that you need to click on the PENCIL button - Load the page AS IS – without the ability to EDIT it in the future
To do that click on the COPY Button
If you have followed the steps above – your AI generated page will now display as part of your website.
Blocks Live trial

GrapesJS Live trial


